Recent Popular Posts

December 20, 2014

English stories and their scratch avatars

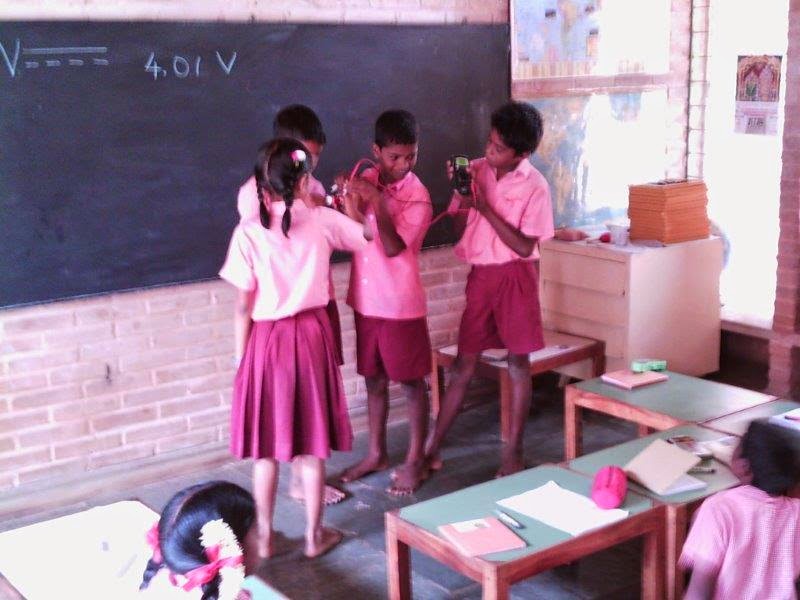
Delivering a good English program is a challenge in most rural schools. To make it a creative exercise at Udavi children are asked to write their own stories. I have already been working with scratch with the 7th graders and with their English teacher we decided to give our time in the holidays for children interested to create their scratch avatars.

The creation of stories into scratch makes the children convert the story into a drama and they need to choose what they want to communicate through the characters and what they want to communicate through a narrator. It also allows for children to work at various levels from those who want to do elaborate animation to those who want only characters to talk alternatively. The aspects of logical thinking is highlighted and some children did have issues when they had more than two characters and they needed to track which character is speaking and how long the other characters need to hold their silence in order not to overlap.

A further complication was when the backgrounds and scenes changed and they needed to time these also right. This got further complicated if they changed the sequence and added a few seconds to read a specific text as all timings after that would change. A couple of students found their story too complicated to implement with timing and were able to learn and use the power of Scratch being an event driven programming language and broadcasted messages when certain events were complete to keep timing manageable even with a large number of characters.

One of the more elaborate stories involved a cat that made machines, got transformed into a half-cat and half-boy, saved the world from a monster, went to sleep and had a dream about an alien attack, then waking up and seeing the dream become a reality and then defeating the aliens. No really, the story exceeds my capacity to make things up:


The 8th grade tried to use the same two characters and have adventures that went to different places. One such story had a very elaborate backgrounds that were hand crafted by the student.


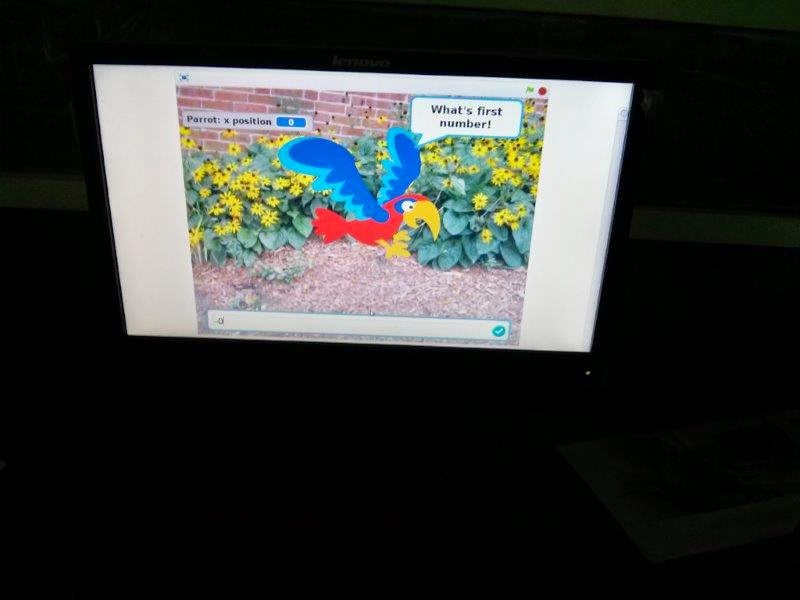
I tried to put a process of students typing in what they wanted to enter as conversation text in the hope that the spell checker will catch something for them and help them learn English. Unfortunately, in the excitement of making the program new dialogues were added and old ones removed resulting in a fair number of errors. However, by and large the idea that they were creating a sort of product was in the students mind and they also made a presentation to the coordinator of the school. Most children were happy that they had something to present.


About 80% of the class who came in the holidays and started the process were able to complete their projects. Here is one in which the child struggled to complete and put in extra time to complete the story.


December 16, 2014

The finch robot : Programming (1)

Programming with Scratch has been getting more interesting with interacting with the real world with the makey-makey that was able to let the computer receive signals from bananas and vegetables. Gaurav's gift of a Finch robot gave a way for children to control something that happens in the real world.

The setup on Ubuntu 14.04/Scratch 2.0 worked with the given guide

I explained and demonstrated the sensors, played with its nose light and then we got down to making the finch move. In the initial exercise I was trying to get the children to move the finch around in a certain order, but what made it interesting was to try to move a crumbled paper ball around and put it in a basket without the Finch falling off.

The finch has two wheels that are controlled independently with (two) motors. The only input possible is a speed from -100 (backward) to +100 (forward). In order to rotate an object, for example, you need to move one wheel faster than the other. Also, since we had not figured a direct relation between the speed and a specific distance there was some guess work involved in the time that it needs to be done for.

The phases involved in solving the problem involved in drawing out what they wanted and what speeds in which wheels for how long will be involved in doing so. The wheels were a little wobbly and even when the two speeds were exactly the same the finch had a bit of a drift to one side. But, that just added to the challenge :).

I split the students in groups of 3 or 4 to allow for discussion and team work. The game was to be able to do it in the least number of attempts. I noticed that groups were not that keen on observing what another group was doing as they wanted to only follow their own program to avoid confusion. But, since my purpose was for them to start predicting the outcome I provided an incentive of an extra attempt if a group predicted the outcome accurately. This got the groups interested in examining each others work as well.
After a couple of attempts the children started to really get into the idea of predicting what a set of instructions is going to do and how to go about solving the puzzle. The reality of a paper crushed into a ball is that it didn't always move with the finch and kept things interesting. Its interesting that while children keep track of the number of tries, etc none of this really matters and the first time a ball falls into a box the children want to do the next puzzle.

The ideas of rotation, positive negative numbers, speed, timing were reiterated. In addition problem solving by prediction, verification and correcting what they were doing and the idea of learning from what happens rather than it just being right/wrong was an aspect looked into.

November 02, 2014

Makey, Makey (4): Water level detection

With the 7th grade at Udavi I revisited the Makey, Makey a week later. I asked the ones who had used it earlier to demonstrate it to their friends who had missed it. The recall wasn't perfect and it gave a chance for them to debug.

Then we took it a step up and asked a different question, what application can we use the makey, makey for. Since it is able to detect the resistance of water we used it as a water level testing and then things got really interesting with them experimenting with their bodies in series with the water, etc.

Here is a video of the class that you can look at even if you have no clue what Makey, Makey is!


October 27, 2014

Makey, Makey – How it works...(3)

The day after the heavy rains we had an almost full strength in the 6th grade at Udavi. The previous day only seven children had worked with the MM and it felt like a good exercise in observation and expression to see how these children described what they had seen. Based on their descriptions I asked children to write or draw what they felt had happened.

All the pics from the ones who had not come had a computer (or laptop) connected to a leaf/plant and apparently running Scratch and making a sound. The children in their excitement to describe the plants, sticks, communicating with the computer had not been able to describe the MM. However, in their own drawings the MM was present as a black box.

We had a discussion of what we see and observe and what we understand and interpret. Once I pulled out the MM the children were able to recall most of what they had seen, but they could not talk about what they interpreted as to what happened initially. As I gave them time, one aspect of the MM sending signals to the computer was brought forward as something they had not seen, but interpreted based on the reaction of the computer and the lighting up of the board when we touched something. The other aspect of understanding how the board was able to detect that it had been touched was ambiguous.

We went to the computer lab and I gave a 'magic show' with making the MM board respond or not respond to my touching by saying it before hand. The children were very focused on what my hands were doing and whether I was touching the banana gently or not as gently, etc and did not notice that in the times I wanted the MM to respond I was touching my legs to the floor. Once I explained the trick I was able to lift my foot off the floor and use the wire provided to connect to the board with the same effect. Then I made it further simpler by bypassing everything and directly connecting the ground to one of the trigger points and then talking about how the circuit is being closed even by me.

We then discussed why we don't see the same in real life of connecting a battery with a LED and holding the two ends to light it. This brought forward the sensitivity of the MM to detect even not so good conductors. Then we moved to what we saw the previous day with respect to plastic and wood and that even their resistance can drop when things are wet.

We concluded with what precautions a lineman should take when working on main lines. The kid of clothes that he should wear especially when it rains.

I then did the same session with the 7th graders and was a little surprised that they were able to give all the signals given by the MM (space, click and four arrow keys). All their pictures highlighted MM and had it in this kind of detail. Thought when describing it in words they also cound not convey the MM. I then realized that since we have been working with scratch were able to understand not only that the MM sent some signals, but had perhaps read the code and noticed the signals.

I could, however, not pull the 'magic trick' on them. Almost immediately one hand went up and then within 10-15 sec three more went up on what I was doing with my foot. The loop closing made sense to the children and they went overboard asking me to use various chains of objects that would close the loop, e.g. touch this banana to the next, then to your keychain and then touch it.

We talked about possible uses of what we could do with a MM. The most common idea is a burglary alarm, but I'm hoping more ideas will come.

October 22, 2014

Makey all wet (2)

Monday morning, the rain had been very strong and I bicycled to Udavi and found many students were unable to make it. The new building had 6-7 kids in grades 4th, 5th and 6th. There were too few kids to take classes and I thought it would be a good opportunity to introduce the Makey, Makey (MM) board.

The MM board is able to integrate with real life objects (leaves, fruits, vegetables, plants) because of its ability to (measure very large resistances) be very sensitive to any resistive path. But, the sensitivity makes it misbehaves in the rain. It took me many attempts to figure out a mechanism to avoid a 'false' trigger. The wooden table that I wanted to use as base had imbibed some moisture and was itself triggering. We finally needed to hold the leaves and other material under test in the air.

When anyone touched the plant or leaf it would trigger scratch in producing a sound. As there were younger children I changed the sounds often. I also choose the sounds of animals (cats, dogs, etc) so the dog would bark when you touched the leaf, etc. The children were quite excited and I tried to tap into it to further inquiry.

What is happening? What do you see? What do you understand? What kind of objects will trigger the sound? We went from leaves, flowers, metal, to a stick of 'dry' wood, wooden blocks, and finally plastic! Everything triggered in the wet and moist conditions.

The plastic cap triggering was really a surprise, both for the children and for me and it was time to find a drier place. The rain then stopped and I took the 6th grade to the computer lab and was happy to find that the polished tables were able to present a dry environment where false triggers didn't happen.

The MM is able to close the circuit with a person without having to hold the earth wire (as indicated in the instructions) by using the floor and this makes thing appear more magical.

The class then continued with the 7th grade and we made a piano with bananas. The 7th graders have been working with Scratch and understood what was happening at a certain level of abstraction that they called the 'MM keyboard' vs the electronics keyboard that their program responded to.


October 19, 2014

Makey, Makey...(1)

At Isai Ambalam school we had set up the computer center and this year I was looking at how to best utilize this for the older children (6th and 8th graders) at the school. We have been working with Scratch programming for math concepts and more recently for creating games with English.

Regine is volunteering with us at the school and observed some of the classes got a very interesting gadget called the makey, makey from her friends to see what we could do with it in the school.

The idea of makey, makey is so simple that it adds to elegance of thought to come up with it. It notices if a circuit is complete and sends a signal to the computer that it knows well - the space bar, left, right, up, down arrow keys and a mouse click. Not very interesting in itself, but the subtle part is that it can detect even a large resistance closing the circuit. This makes it possible for it to detect a human body, a banana, a leaf, etc to close the circuit and lets it interact with objects from the outside world not associated with the computer.


The picture above is me playing a drum and a guitar string with each banana using Scratch.

Technically you need to hold one wire in your hand and play with the other hand. 
But, in our class the grounding of the computer room was quite good and since we leave our footwear out we were completing the circuit by simply letting our feet touch the ground. this meant that anyone could just touch the banana and get a space registered which meant in scratch could make a drum beat.

Of course the children were not convinced that it was the ground completing the loop and they pulled up their feet sitting on the plastic chairs and checked. Luckly the internet had been shut down due to heavy rains and we have to open scratch and create our own programs, choice of music and notes.
Once the kids were comfortable with what they were doing they asked the other teachers to come and try out the musical instruments.

Now, we will build on it and see what else is possible. One child has promised to work on a burglary alarm, another is making a full piano, lets see.

October 18, 2014

Seeds...

With the 6th grade at Isai Ambalam we have did some experiments with measuring the pendulum as an application of decimal numbers (and division by 10). I use my watch as a stop watch for the measurements and kids were having a little bit of fun trying to find out the shortest time they can start and stop a watch. We were talking about time and measurement when Saj asked how often I change the battery in my watch. 
I mentioned that I hadn't changed the battery since I bought the watch so it should easily last a year. Saj immediately got back with the fact that I have been around for 1-1/2 yrs and he has always seen me with this watch. Observation (check).
Then he says, wow, that watch must have "very low Watt". Wait where did this come from?
Vij who is new to the class enquires what is Watt. Saj replies that we did it last year, its the energy that the watch takes. Ani corrects him that its the power. Saj concurs and reminds himself that it is indeed the power. He goes on to tell Vij that the light consumes 40W and the fan 70W of power and its only when it is multiplied by time that it becomes energy, actually Wh. Recall (check), application (check).

Last year I had asked the 5th graders to go around the school and look at the number of lights and fans in each class and estimate the power and look at the time it was on for in a day to estimate the energy (as application of multiplication). 

I said the power is very, very low and you would need to split a Watt many times. Oh said Saj, does this mean it will be a decimal point followed by many zeros? Decimals (check).

I actively look to connect concepts that we have done in the past, but it was interesting to see the seeds that were planted a while back come forward as a regular conversation without any planning.

October 08, 2014

Government teaching training workshop

Isai Ambalam School has been partnering with the government schools for many years now. Their partnership has been useful for the school in spreading what they learnt and to review any training material that is received by the government schools. They are also informed of any ongoing teacher training. Last month there was a government school teacher training for 6-8th graders math teacher. These are the grades that I have been working with for the last year or so. Subash suggested that I attend the workshop and (if opportunity presented itself) train the teachers. At that time I wasn't very convinced exactly how an opportunity would present itself. I skipped the first day of the three day workshop. But, Kavitha attended it and built a rapport with the coordinating trainers who thought it would be interesting to have me there the next day.

I took along all the TLM that we had used, pizza party, dienes blocks a mini weighing balance and also some of the computer related stuff - geogebra and scratch programs made by children.

The teacher training happening was interesting, on the one hand teachers were told that they need to connect what they teach with everyday life of children most of the time was spent on providing teachers tit-bits of trivia that would help them make the classes interesting e.g. different antiquated units of measurements used in India for land measurement, their conversions (beyond cent, acre and hectare), the number of years it took to build certain temples and some puzzles - two numbers multiply to give a third number and all the digits need to be used only once. Finally, we got to using 10- 5 to get certain numbers and there were many possibilities and I started having fun :).

The teachers were curious as to who this new kid on the block was and I got my turn. I gave then a background of the work with low cost materials as well as the computer based stuff that we had done in the schools and let them choose what they wanted me to talk about. The teachers wanted to see it all. In the first day, for the rest of the morning, I presented the work of the children (on scratch), the tools we used and how we can creatively combine the tools e.g. the denise blocks along with a weighing balance. I also talked about how many of the areas are connected to each other and that they could be linked to each other when they are introduced. They asked for another session the second day to concentrate on areas that they had difficulty with primarily fractions, place values, decimals and algebra.

We talked about fractions can be introduced with pizza party games and addition of at least a set of 10 fractions can be explored with this without formally getting into it. They progressing through equivalent fractions and only then moving to LCM. I also showed some of the work the children had done in explaining how fractions can and cannot be added. The teachers seem to find the approach different and interesting.

The teacher were quite surprised with the work of the children on scratch and while this was appreciated and four teachers even copied the software and the work of the children to view it for themselves at home. They made it amply clear, that they did not consider it possible to take this to their children even though they had a computer lab and an instructor.

The teachers showed most interest with use of materials like the denise blocks, in volume measurements (cc = ml, how much is 1L in number of cubes), algebra and a mini weighing balance. The idea of introducing place value by weighing bunch of blocks on one side and a set of tens and ones on the other to show that the decimal system is more convenient (for humans).

However, when it came to using a program like Geogebra some of the teachers were up in arms. Why would we teach four digit multiplication if it can be done easily with a computer? Good question, why do we teach children four-digit number multiplications? These discussions helped me get deeper into the purpose of math as interpreted from the NCF 2005 document. If 4 digit multiplication is taught it is to help the child's procedural mind. We also talked about the idea of an approximate solution and a feel for the numbers that children do lack which would certainly be worth working on.
Of course, its also a tool that can help in developing an intuition into something that would take them much longer to do e.g. discovering the relationship between the radius and the area of a circle, or a series of lines like x+y=constant.

Given the apparent confusion of children between fractions and percentages/decimal I walked them through the method of looking at the denominator to estimate 50% (1/2 of the denominator), 10% (.1 of denominator) and 1% (.01 of denominator) to compare and build up the numerator. But, by an large the teachers had difficulty in grasping it and told me that even though they had difficulty and children are unable to get a handle on the sense of a fraction it was out of syllabus :). Ah well...

It was nice to see that the teachers were able to notice what the children had difficulty with and when they felt that someone could help them help their children they were quite involved. Teacher training is a mandatory program and teachers get back by taking 1 hr tea breaks, but the same teachers moved their lunch by almost 45 mins to accommodate my session which I much appreciated.

October 03, 2014

Probability for 6th graders?

As an introduction to fractions the children were playing the pizza party game. They read the rules and the first game they played helps them get accustomed to the pieces (1/2, 1/3, 1/4, 1/6, 1/8). There are fraction sheets corresponding to each of the fractions as shown below.
The children throw a dice with these fractions on it, they pick up the fraction sheet that faces up. They then try to fill the sheet by waiting for their fraction to come up in their turn.

The game is of course terribly unfair for the children who get smaller fractions (and yet children do enjoy playing it), but I wondered if we could use this as an opportunity to see probability in action. I asked each child to write down the fraction (not person) who won the game in their group. Once the game was played a few times I made a tally of how frequently a fraction won.


As each student read our her/his findings it soon became clear that most of the time 1/2 was winning, once in a while 1/3 won and very infrequently 1/4 won. With these rules 1/6 and 1/8 did not win any games played. 

We had a conversation of whether the rules were fair to each fraction. Then we moved to the question of why it is not fair. It was nice that some of the children were able to think this through. The first child who got it said that its because 1/8 fraction needs 8 pieces and you need to get 1/8 8 times, vs 1/2 where you only need to get 1/2 2 times. Getting something two times is 'easier' than getting something 8 times. In a few minutes most children were also giving their explanations along the same lines.

I proposed a different set of rules for the next game to try to help the 1/6 and 1/8 (and get them comfortable with equivalent fractions). If you get any piece that lines up with the lines on your sheet you can take that many pieces i.e. on a 1/8 fraction sheet, if you roll 1/2 you can take 4 pieces, if you roll 1/4 you can take 2 pieces and if you roll 1/8 you can take one piece. But, if you roll 1/3 or 1/6 you need to pass. I asked if this set of rules would even the odds...the children were unsure so we went for a few rounds of the game with the new rules.


We had just enough time to come together and tally the results. 1/8 followed by 1/6 were the most common winners, 1/4 was next followed by 1/2. 1/3 was the least common fraction to finish first.

I asked them to think up game rules that would both be interesting and fair to the fractions. A couple of days later, they came up with some games. Some of the games  proposed were repeats (apparently arrived at independently). I asked the children to rate the games in two parameters, their interest in playing the game and if they thought the game was fair. 

Game 1: Like the first game, but you can take a piece of your fraction even if you get a nearby fraction e.g. 1/6 for 1/8. 
Q & A: What about 1/3 & 1/2? Yes you can take these pieces as well.
Interesting - 13, Fair - 1

Game 2: Have all pizza common, you place the fraction you get. The person who finishes a pizza first wins.
Interesting - 11, Fair - 8

Game 3: Like first game, but if you get a fraction you can't use, you give it to another person who has that card.
Interesting - 11, Fair - 11

Game 4: You just need to make a full pizza based on whatever your dice gives.
Interesting - 14, Fair - 10

Game 5: You can give and take pieces from others. 
Q & A: On what basis? Not clear, it needs to be figured out. (Calvin Ball!)
Interesting - 16, Fair - 6

5 children were not participating in the fair/not fair question as they were in doubt, but a large number of the remaining were able to guess that 1 was unfair; 2 was fair (to people); got tricked in 3 because it seemed that you were being nice (so it must be fair!); that 4 is fair. I am unclear about the rules of 5, clearly the children found the lack of clarity appealing :), but were less sure of its fairness!

Need to update this blog when we play the games again.

October 01, 2014

Guided learning: Using computers

One of the fun aspects of learning while having access to a computer center is the exploration style of learning that is possible accurately with Geogebra on the computer. To learn about shapes like triangles, angles, circles, etc through measurements. Looking or patterns and making observations and deriving some sort of a generalization made for an excellent exercise.

Here are some of the things that worked well us:
1) Using geogebra as a drawing tool in practical geometry to draw various equilateral triangles. A line segment is drawn with A as center passing through B. Then a circle is drawn with center of A passing through B and then a circle with center at B drawn through A. The meeting point of the two circles is equidistant from both A and B for the same lenght thus giving the equilateral triangle. The children can then measure the angles and distances. As they create and measure many more triangles using different lengths for a side they realized that all equilateral triangles have the same internal angle of 60 degrees.
2) A triangle with three sides can be drawn with a line of one of the lengths and then circles with radius of the other two sides. The point of intersection of the circles gives the third point of the triangle.
Picking up three random sides of a triangle in a class brings up the triangle inequality, when children are unable to find a point of intersection and naturally moves one to the realization that two sides have to be greater than a third to make a triangle. I encourage the children to try using the first side as any of the other sides and see what happens e.g. 1 cm, 2 cm, 4 cm has the following three ways of looking at it. Interestingly, I only thought of the inequality as the third figure, but some of the children seemed to find one of the other two more sensible.


3) Some other observations about triangles  also came about by this process
- Isosceles triangle has two angles the same
- Sum of the angles was always 180' no matter what the triangle
- The largest side is opposite the largest angle.
Then we did some games using a combination of these e.g.  would the central angle of a triangle 4, 5, 5 be less or more than 60'.
The children were starting to get a feel that sides and angles are not independent quantities.

4) Circles - circumference in relation to circle diameter, area relation to the area of a square with one side as radius. These were fun exercises that I had attempted by getting the kids to do physical measurements last year. It took quite some time and due to measurement inaccuracies (especially when measuring small objects like ear rings) could throw the kids off. The ratio of pi (that they presently know as 3.14) came out like magic as geogebra could be used to measure these quantities of interest no matter how small or how large the circle was. I skipped the calculations at this point and stuck to creating a spreadsheet of the circles that children drew.

The children were each able to document 10 circles or more that we were unable to last year. The number has really stuck with them as an assessment recently (with circumference given and radius/diameter to be calculated) showed with over 75% of the class guessing these right.

5) Algebra
The notion of what lines like x+y=10, x+y=20 look like coupled with stories like you and I share 10 chocolates, if I get one more you should get one less (negative slope) had done. Again an assessment later indicated that most children were able to get this.


September 28, 2014

An interesting detour...

I usually go over addition of fractions with equivalent fractions. The idea being that you can only add fractions when the pieces of the pizza (so to speak) are the same size...

The children had worked with this for three days and learnt to notice that when the denominators are the same they could use that fraction to replace the original fraction. In order to reiterate that doing equivalent fractions was to get pieces of the same size and look at the number of pieces we would have for that size I started comparing fractions using a similar method i.e. do equivalent fractions till the denominators are the same (same size of pieces) and then compare the numerators (number of pieces).

We did a few examples in class and I asked the class to write fractions of their own and do a similar comparison at home. Homework is always interesting, it gives you a look into how children are processing the material and often the kind of short cuts they have thought of. The children came back with fractions that they knew how to compare. Other than the pieces they had learnt well about by playing fraction games (1/2, 1/3, 1/4, 1/6, 1/8). None of them had used the equivalent fractions. We started looking at the kind of fractions that are easy to compare and don't need an equivalent fraction.

1) Fractions with the same denominator (obvious)
2) Fractions with the same numerator
This started with fractions with a numerator of 1 and it was nice that the children were able to connect with division stories and notice that if the denominator was larger than the size of the piece was smaller and the larger fraction was the one with a smaller denominator!
This was then generalized to other numerators as long as they were the same. 
3) I decided to push the envelope and introduce another rule to get the kids to think about it. How about comparing 4/5 and 5/6 and coming up with a logic for that.
I spelled it out each of them is a pizza with one piece missing, the first one has a bigger piece missing (1/5) the second a smaller one (1/6). What does that mean?
Two kids in class got it immediately, I use peer learning significantly in class and I asked the kids who got it to reiterate what they understood, after a couple of them said what they understood (even if the words they use are the same as what I used, more kids get it each time!). A good part of the class had got it and I asked children to practice 10 comparisons with each of the rules.

An alternative I use for 'did you do your homework' is asking 'if anyone wants to show me their homework'. This time when the kids got back, I asked the kids what fraction pair they still found difficult to compare. The pair they put on the board gave an indication of how much they were able to assimilate. Each student said they still had a pair that they found difficult to compare. One by one they put 17 fractions on the board. Thankfully, there were no fractions of the 1st and 2nd kind. 

I asked the class if they could find a fraction pair on the board that they did know how to compare. If they could they would come and confirm with me that their logic was ok and then explain it to the class. There were some of the third rule, then things got interesting.
- They were able to extend the third category with fractions like 6/8 and 13/15. Both are missing two pieces, but the second is a smaller piece. Neat now they were thinking are there others that can be compared like that? There were 5 of this kind.
- The next set that the children noticed noticed where the fraction numbers where the denominator was large, but the numerator was smaller i.e. The piece is smaller and there are less of them 3/25 vs 2/27.
- The last was special, one child pointed out that one of the fractions was less than half and the other more than half. 17/42 he pointed out was less than 21/42 which was half. The other fraction 9/16 was greater than 8/16 which was half. So 9/16 was greater than 17/42 even though there were more pieces of a smaller kind.

With these rules 15 of the 17 fractions on the board were knocked off. There were only two left these were pretty close to call with and the children who could compare them had done so using equivalent fractions.

Then we moved on to sorting...it was nice to have started from something that I was required to do - teach addition of fractions  and move to something that I wanted to do, a feel for fractions, creating abstract rules from real situations and being able to think creatively.

August 15, 2014

On confusions and clarity...

Its interesting how small things can confuse or clarify things for children. At times the children dwell in their confusion and come out with clarity and growth. At other times they reach the end of their patience and look for adult intervention. I often relying on giving time, peer learning, but sometimes peers are unable to fix the problems because they don't have the same problem and can't find the patience to understand the problem. Here something that happened this week at Udavi (6th Grade) and Isai Ambalam (5th Grade)...

We had been working with the weighing balance to apply addition, subtraction, multiplication and division with using things that could be put into pencil boxes. As I was weighing some working with different blocks I noticed that the hand made blocks were not all the same and for a change we went into a puzzle to identify a heavy block among three blocks. In time, I talked about the use of math to document what we learn and create processes. We numbered the blocks so we could distinguish between them and know what you did with them. When the children were comfortable having observed the process with real blocks we thought of ways of writing it out and came up with the following flowchart.

This chart confused quite a few kids. I asked what they had not understood and if they would like me to repeat with the blocks. The children said that they understood the physical measurements. I spent some time revisiting >, < signs and a couple of children did have difficulty with that, but for most that was not the problem. They just felt they didn't understand and something was off. I stared at the picture myself and then some clarity dawned and I drew this one...

Logically it was the same flowchart. Only it had when one is used on the left and when 2 was used on the right with the corresponding >, < signs reversed. This clarified the issue for almost all children instantly. A couple of children go it once they were able to discuss it with their classmates who had now understood.

It was interesting that when the children were working on finding the lighter block they actually switched the signs again to get 1 continuing on the left and 2 on the right. 

Its also interesting that as they started dwelling into more complicated problems of not knowing if the ball was lighter or heavier and with 4 balls they got quite good at the symbols and were able to play around with any order.

I took the same problem with the 5th graders in Isai Amlalam. Having learnt from my experience I did not want them to fall into the same trap and once they were comfortable with what physically happens with 3 balls I went to the pic that I found was flowing in class. 

Apparently the pic didn't make sense to some kids. I went over the signs >, < but still there were 4-5 kids who looked puzzled and few others who seemed to have got it were also a little uncomfortable applying it to another puzzle. Finally, one child articulated that he didn't understand how 2 could be greater than 1. I told him that its only a name to keep track of the balls, but then I took the names of three of the kids in the first row and used these for the name of the balls. I wrote their initials V, D, A and this put the children at ease to work on these puzzles.


August 12, 2014

Weighing in...math in a pencil box

A fair number of children who have difficulty with algebra have difficulty much earlier with understanding subtraction and division, two areas that we had covered through stories in class. The children felt that they had practiced and were confident that they can create stories, interpret my stories into numbers. I decided to use an assessment that would require application of these concepts in real life using a weighing balance.

I started with one of their pencil boxes, passed it around and asked them to guess its mass. Once they had all recorded their guesses in their notebook we measured it (52 g). I then took 10 pens and put in inside the pencil box and repeated the process. I asked them to guess the mass of one pen. Then scale it with 10 pens. They came up with 90g-100g as their guesses. We then made the measurement (102 g) and I asked for the weight of one pen. As with the previous process the children started guessing. I told them they had already guessed and this time I would like a correct answer. The children could not walk back the path they had come and correct for the measurement they came up with interesting answers including some that were over 10 g. I tried to help them by walking through how I would do it with what the mass of 10 pens would be. I was intrigued that some children were confused by this process and some even managed to add the two measurements (152g). On digging deeper I realized that these children could only think of subtraction when a clear word 'remove' was part of the construction.
I had to move from 
Pencil box mass is 52g. Pencil box with 10 pens mass is 102g. What is the mass of 10 pens 
TO
Pencil box with 10 pens mass is 102g. To find 10 pens mass I need to 'remove' the mass of the  pencil box, which is 52g. 

To open up the puzzle  (well it had become one) for children's participation, I asked the children to each list 10 kinds of items that they could put in the pencil box. With time I added clarifications that the items needed to be something they could find copies of and for a couple of children needed to reiterate that 'kinds' was different kinds of items and 10 pens didn't work. We then measured one of the item they had in mind and the children made their own stories with pencil-box+some number of objects * mass of one object that they had measured. This process involving addition and multiplication that all children find comforting. As they exchanged their stories and solved them they did get practice in handling what they had initially felt a very different problem.


Its actually interesting that I tried these out in different grades and how the numbers change appropriately. For children in 5th grade the number came out as a round number, for the children in 6th grade the objects we picked up had a touch of a fraction and when we did the same exercise in the 7th grades the weights gave some neat decimal numbers. 

August 11, 2014

Some activities

Here are some activities I have used in class either for refreshing the class, introducing some fun or doing a centering or calming activity.

Big fish, small fish
Just a quick activity to freshen the minds is to hold hands close and call it big fish, and far apart and call it small fish. Using this small twist you go fast and slow emphasize big and small at different times and keep going till the kids can keep up or realize that they made a few mistakes and stop.

1 to 20
Generally acts as a centering activity to let the group count from 1 to 20. The catch, if two people call out at the same time you start from the beginning. There can be no pre-decided format or calling order. You can lift your hand or give indicating that you are going to speak. If the kids start using a pattern you can just call out the number along with the kids and you begin again as a group.

Weighing balance
You can have unlimited fun with weighing balances. Starting with estimation and guesses, you can move to addition, subtraction, multiplication, division and then to algebra. You can also throw in puzzles of trying to find which ball is heavier/lighter in a given set.

Stetescope speaker
Measuing heartbeat can be a fun activity especially when coupled with some exercise like running. In addition getting a child (or adult) to hear heartbeat and act as a human loudspeaker calling out the lub-dubs quietens the entire class trying to count heartbeats.

Place value kits and tables
A neat activity we got going with place value kits (ones, tens and 100s) was to use a few of the blocks - 3x10 and 8 ones or so to come up with as many multiplication possibilities as possible (without repeats and without all in one row) with few or all of the blocks.
The activity really helped getting the idea of the area of a rectangle represents multiplication home for the children.

July 31, 2014

Electronics: Bigshot camera lessons

The gearbox on the bigshots gives an opportunity to dwell into the energy generation in the camera using a manual crank. I had already demonstrated that only at reasonable rotation of the handcrank the battery charges.

I wanted to give children something tangible to measure so I can connect it back to math (especially decimals as I am in the process of introducing these). For the measurements I needed to introduce the multi-meter. I started with the most exciting feature of the multi-meter, the continuity test and though I had not intended for it to become an entire class the children did not tire of getting materials that they thought would conduct or not conduct electricity. The most interesting choice of elements being magnets.

I next introduced DC voltages. I still find it amazing how much of electronics terminology is commonplace with children. They knew it was called Direct Current, but didn't know why. I called it a battery voltage. We measured various batteries and learnt how to read the voltage rating on the batteries.

With a bit of difficulty with water analogy I have started to use the body and flow of electricity to the flow of blood in the body and the battery as the heart that pumps the blood through the body. The voltage in this analogy is the pressure with which the heart pumps. Children relate it to when they are engaged in a physical activity and their heart pumps harder/faster.

We then measured the voltage of the rechargeable battery of the bigshot camera. We found it to be 4.1 V. The children summarized that what was charging this battery had to be greater than 4.1 V. They were quite surprised when they disconnected the battery measured the output of the PCB was 0 V. I then reminded them that that hand crank was disengaged. On rotating the hand crank they did get a voltage around 5 V (not loaded with battery). 

The Bigshot learning material talked about how the AC from the dynamo gets converted to DC for the battery. I felt that could be something fun to measure and realize the difference between DC and AC. I let the children measure with multi-meter still set in the DC mode for the children to see that an AC gives zero DC. We bypassed the PCB and directly measured the output of the dynamo. It was I who was in for a surprise, the meter read 9 V during one of the turns. I realized that it was only a small DC motor giving un-regulated DC voltage that was being regulated for the battery by the PCB. The pic below follows the link to the images:

I noticed that children are really struggling with indoor images and if you are absolutely still when taking the shot, you can get a few decent shots. Something I need to train the kids in.

A few children had done the demonstration for the class and I thought this was something they could all measure. I brought in few cameras assembled by other grades and we disassembled these cameras. The next day I split the class in groups of two and gave the choice to do the measurement or to assemble the camera. Its little surprise the children wanted to assemble the camera. This was the smallest (2 in a group) and youngest group I had given the task to and they went about it quite nicely. I also found the first broken part (a tooth of gear C) and  the first missing part (an axle) after all the assembling and disassembling by the children.

One interesting mixup was when one group accidentally connected the battery to the dynamo. The hand crank started to rotate and the kids were spooked. Well, it did confirm that we were working with a DC motor as a generator. Here are some images from the assembly:


July 30, 2014

Bigshot: Biology field trip


I had presented BigShot cameras at the teachers meeting at Udavi with the hope that someone will want to pursue it with grades other than 6th and 7th that I interact with.

It was interesting that the first opportunity presented itself through Biology. Geetha the teacher had mentioned that she was planning to take the children out on a field trip to the crocodile park and through it would be interesting to take a few cameras along. It didn't take long before she realized the utility of the children putting together the cameras rather than being given the cameras as it would be instructional and increase the ownership of the instrument during the trip.

As I had worked with these children the last year and they were a little older I gave them the option of watching us build it or building it themselves. I was not surprised when they came back with, we can do it ourselves. The children assembled the cameras at different paces. Most groups needed a little support when they came to the finer components of the camera lens.

Most groups went over the instructions and in most places these are supported well with images so the groups having a little difficulty also had support with the images.

The children enjoyed the session and then went out and took some pics of the school.


The next day they went to the crocodile park and took plenty of pics. The children sorted through some 100 odd pics from each camera and put together an album for me. I've put together a few of these pics that were non-overlapping.


The children also wrote about their experiences with the Bigshots camera. The children found the process demystifying. Some children found reading the manual the difficult part. Most found the actual assembly a lot easier than they expected. Almost everyone was thrilled and enjoyed the experience. At the crocodile park some ran out of charge quite fast (possibly because its not obvious how to turn off the display) and the hand crank kept getting stuck for them. Here are some of their experiences. 

July 20, 2014

Taming Frankenstein

As I progressed towards getting children proficient with both positive and negative numbers the 'target' game got tuned further. I allowed students to put the starting number and guessing the number needed to get to target and as part of meta-cognition test I asked how many children felt they were proficient with integer arithmetic 6 children stood up immediately. Most others were able to do 'sums' on integers, but the idea of subtracting the starting point from a target worked ok in their head with questions like 5 going to 10, -11 going to 7, -17 going to -35 got messy.

With a few commands we transformed getting a user number (which some children were sticking to 'simple' numbers) to a random one and putting in a count for correct numbers. The twist was that the count was zeroed out if you got one wrong. I asked children to show their proficiency by getting to 10. Time not being an issue. Every 5 minutes or so the room will have an aaagghh, oh no as children made progress just to be shot down before they could get to 10. I decided not to tell the children about Frankenstein, but they felt that they had created the game and should be able to beat it. Arc was able to beat her game and was quite pleased with herself. Lets see if the other kids get the same high tomorrow.

Teacher Note:
I've made it a little simpler with +1 for a correct answer and -1 for an incorrect one. A list tracks all the problems where the child was confused so you can look at it in detail once they are done.


July 18, 2014

Gear Up: Lesson using bigshot camera

The children in Udavi 6th grade had assembled the bigshot camera and taken pictures. They had also taken note of some of the components of the camera. We started with the gear box to learn more about gears, how they work and what kind of math they would need to learn to appreciate and predict what happens.

The obvious gears that the kids knew about was my gear cycle. We flipped the bicycle upside down and the kids counted the gears. The kids tried to find more efficient ways to count and finally concluded with 42 teeth. They then went out to count the number of gears. We had seen a couple of videos on gears including Aravind gupta video on making it from cardboard. We talked about whether the smaller or the larger is a higher gear, what the additional gears that are always engaged (derailleurs) do. 

Thanks to the video most kids were able to conclude that the smaller the diameter in the back wheel the higher the gear. When we got to the ratio of the chain wheel vs the back wheel the kids were ok with the gear with 21 teeth for a ratio of 2:1, but got stuck on 28 teeth. It was a note on what we will be learning this year to be able to talk about it by the end of the year.


I also demonstrated with a few gears how we could make a model with different kinds of gears to rotate small (fast) and large wheels (slower) when they are coupled. We then looked at a gear game Kogworks which seemed appropriate and looked at the patters that can be formed and whether the wheels still spin if the number of gears in a loop are even or odd...

One of the kids the brought his toy car and opened it up to reveal that he noticed gears in it. He showed how pulling the wheels back cocks the large gear and releasing it makes the smaller one that drives the wheels of the car move.


July 10, 2014

Making a game...

I had a discussion with the computer instructor comparing teaching children programming (scratch) vs Openoffice in 6th-8th grade. We noted that it is possible that the office tools may have a role to play when they eventually graduate and look for work. We talked about how long it really takes to get a basic hang of what can be done with office and as children what application/interest they would have to build on it. The discussion helped me realize that Scratch allows the children to create something that can interact with them/others vs only present.

I started working on this by making the basic program they were working with interactive. Check teacher note for more details on integer addition.


The children felt the characters they had created real. They were able to relate the movement of their characters from the center of the stage to the left and right in terms of the number line and didn't get all worked up as the previous set of children I had worked with regarding negative numbers.
 

The kids seemed to be enjoying themselves punching in numbers and checking if they got it right. I asked them if they were really enjoying themselves and they said yes. But, there was no uncertainty or serious challenge and I want's sure if the children were enjoying themselves or if they had found a comfort zone. It was time to stretch.

We made a game out of it by allowing the user to enter a number and then have to reach a target randomly chosen by the computer. This allowed for having to think through where they were and where they needed to go and calculate accordingly. It seemed challenging, perhaps, too challenging for the younger children. When we did a self assessment the elder children felt their best work was to create the games and the younger ones kept talking about wanting to master the game.

In one of the classes, I helped them add a timer. Though they were troubled by the timer when the played the game, they simply could not take it out as they had created the game and it was a cool feature. Creating the game and playing with it were valuable complements to the discussion we had in class regarding integers, in specific negative numbers.

Teacher note:
For addition of integers the interactive program places the character at x=0. The user provides the first number and it moves that many steps and then the user provides the second number and it moves as many steps.

In one grade I introduced negative numbers initially with story of
5-10 where you had only Rs.5 and needed to buy a chocolate for Rs.10 and needed to take a loan from the shop for the same.
We then slowly drifted to Scratch. It was interesting that children are able to see scratch as something real that they control. The children all use their own characters and objects so I guess when I starting talking about what does move x 10 do the children had no issues talking about how you move right by 10 and that move x -10 says change direction to what you were moving before and goes left instead. 

I was careful to position a negative as a turn around (change direction) rather than left as it gave me the option of introducing a double negative as going right.